Primary Applications
Residential, Commercial, Industrial, and Agricultural applications wherever hard water is present.
INSTALLATION
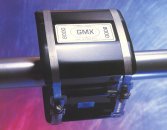
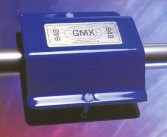
Please Note: Each Model 8000 set consists of two separate pieces. One piece has two north pole magnets. This is the side covered by the GMX label. The other piece has two south pole magnets. A system consists of one or two sets, held to the pipe by a common band. There should always be a 1″space between units.
Installation on 2″ to 4″ Pipe:
Install four sets 1″ apart . The sets must be placed so that the north pole pieces are lined up with each other on the same side of the pipe, and the south pole pieces are in line with each other on the exact opposite side of the pipe.
Installation on 5″ to 6″ Pipe:
Install seven units 1″ apart. The sets must be placed so that the north pole pieces are lined up with each other on the same side of the pipe, and the south pole pieces are in line with each other on the exact opposite side of the pipe.
Installation on 6″ to 14″ Pipe:
Install seven to 15 units depending on the diameter of the pipe. The north pole pieces of both sets in each unit must be placed side-by-side on one side of the pipe. The south pole pieces of both sets in each unit must be placed side-by-side on the opposite side of the pipe. (For example, if the two north pole pieces in the unit were placed at the 11:00 and 1:00 positions, then the two south pole pieces would be placed at the 5:00 and 7:00 positions.)
PROCEDURE FOR INSTALLATION
1. Position the Model 8000 units according to the preceding instructions.
2. Hold the units into position with fiberglass tape before installing the steel banding.
3. Hold the “rack” that comes with the steel banding so that the words ” This Side Up” are facing you. Insert the end of the rack into the screw housing and turn the screw just enough to engage the rack.
4. Bend the end of the steel band toward the underside to form a hook. Insert this into the band slot in the housing.
5. Wrap the band snugly around the units.
6. Make a second bend [hook] 1″ past the band slot in the rack. Secure the band ends behind the units.
7. Insert the hook into the band slot in the rack and flatten it to form the clamp. Any excess band must be folded back under the unit, or can be trimmed off. Tighten the screw with a screwdriver to the desired tension.
8. Carefully check the units to make sure they are firmly secured to the pipe before removing the tape.


